vague memory

うろ覚えを無くしていこうともがき苦しむ人の備忘録

Ansible で AWS Systems Manager パラメータストア (ついでにシークレットマネージャー) から値を取得

Parameter Store

パラメータストア参照は aws_ssm プラグインで行えます。 version 2.5 から実装されているようです。

Requirements 記載の通り、 botocore,boto3 が必要になります。インストールされていない状態だと下記エラーとなります。

FAILED! => {"msg": "An unhandled exception occurred while running the lookup plugin 'aws_ssm'. Error was a <class 'ansible.errors.AnsibleError'>, original message: botocore and boto3 are required for aws_ssm lookup."}

DescribeParameters

# ap-northeast-1
+---------------+--------------------+----------------+
|     KeyId     |       Name         |     Type       |
+---------------+--------------------+----------------+
|  alias/aws/ssm|  an1-securestring  |  SecureString  |
|  None         |  an1-string        |  String        |
|  None         |  an1-stringlist    |  StringList    |
+---------------+--------------------+----------------+

# us-west-2
+---------------+--------------------+----------------+
|     KeyId     |       Name         |     Type       |
+---------------+--------------------+----------------+
|  alias/aws/ssm|  uw2-securestring  |  SecureString  |
|  None         |  uw2-string        |  String        |
|  None         |  uw2-stringlist    |  StringList    |
+---------------+--------------------+----------------+

tasks例

存在しないパラメータはエラーにならず空文字で返却されるため、値チェックを入れた方が良さそうです。

  pre_tasks:
    - name: 'set ssm parameter store values'
      set_fact:
        an1:
          string: "{{ lookup('aws_ssm', 'an1-string') }}"
          securestring: "{{ lookup('aws_ssm', 'an1-securestring') }}"
          stringlist: "{{ lookup('aws_ssm', 'an1-stringlist') }}"
          not_exist: "{{ lookup('aws_ssm', 'dummy') }}"
        uw2:
          string: "{{ lookup('aws_ssm', 'uw2-string', region='us-west-2') }}"
          securestring: "{{ lookup('aws_ssm', 'uw2-securestring', region='us-west-2') }}"
          stringlist: "{{ lookup('aws_ssm', 'uw2-stringlist', region='us-west-2') }}"
          not_exist: "{{ lookup('aws_ssm', 'dummy') }}"

    - name: 'check ssm parameter store values'
      debug: msg="check variable {{ item }}"
      failed_when: '{{ item }} == ""'
      ignore_errors: yes
      with_items:
        - "an1.string"
        - "an1.securestring"
        - "an1.stringlist"
        - "an1.not_exist"
        - "uw2.string"
        - "uw2.securestring"
        - "uw2.stringlist"
        - "uw2.not_exist"

  tasks:
    - name: 'output ssm parameter store values'
      debug: var="{{ item }}"
      with_items:
        - "an1.string"
        - "an1.securestring"
        - "an1.stringlist"
        - "an1.not_exist"
        - "uw2.string"
        - "uw2.securestring"
        - "uw2.stringlist"
        - "uw2.not_exist"

実行結果

TASK [set ssm parameter store values] ***************************************************
ok: [test-instance]

TASK [check ssm parameter store values] *************************************************
 [WARNING]: when statements should not include jinja2 templating delimiters such as {{
}} or {% %}. Found: {{ item }} == ""

ok: [test-instance] => (item=an1.string) => {
    "msg": "check variable an1.string"
}
ok: [test-instance] => (item=an1.securestring) => {
    "msg": "check variable an1.securestring"
}
ok: [test-instance] => (item=an1.stringlist) => {
    "msg": "check variable an1.stringlist"
}
failed: [test-instance] (item=an1.not_exist) => {
    "msg": "check variable an1.not_exist"
}
ok: [test-instance] => (item=uw2.string) => {
    "msg": "check variable uw2.string"
}
ok: [test-instance] => (item=uw2.securestring) => {
    "msg": "check variable uw2.securestring"
}
ok: [test-instance] => (item=uw2.stringlist) => {
    "msg": "check variable uw2.stringlist"
}
failed: [test-instance] (item=uw2.not_exist) => {
    "msg": "check variable uw2.not_exist"
}
fatal: [test-instance]: FAILED! => {"msg": "All items completed"}
...ignoring

TASK [output ssm parameter store values] ************************************************
ok: [test-instance] => (item=an1.string) => {
    "an1.string": "Tokyo文字列",
    "item": "an1.string"
}
ok: [test-instance] => (item=an1.securestring) => {
    "an1.securestring": "Tokyo secure文字列",
    "item": "an1.securestring"
}
ok: [test-instance] => (item=an1.stringlist) => {
    "an1.stringlist": "Tokyo リスト1,Tokyo リスト2,Tokyo リスト3",
    "item": "an1.stringlist"
}
ok: [test-instance] => (item=an1.not_exist) => {
    "an1.not_exist": "",
    "item": "an1.not_exist"
}
ok: [test-instance] => (item=uw2.string) => {
    "item": "uw2.string",
    "uw2.string": "Oregon 文字列"
}
ok: [test-instance] => (item=uw2.securestring) => {
    "item": "uw2.securestring",
    "uw2.securestring": "Oregon secure文字列"
}
ok: [test-instance] => (item=uw2.stringlist) => {
    "item": "uw2.stringlist",
    "uw2.stringlist": "Oregon リスト1,Oregon リスト2,Oregon リスト3"
}
ok: [test-instance] => (item=uw2.not_exist) => {
    "item": "uw2.not_exist",
    "uw2.not_exist": ""
}

Secrets Manager

aws_secret プラグインを使う方法と、aws_ssm 経由で取得する方法の2パターンが利用できそうです。

aws_secret

シークレットマネージャー参照は aws_secret プラグインで行えます。 version 2.8 (2019-05-16) から追加されました。

Requirements 記載の通り、 botocore,boto3 が必要になります。インストールされていない状態だと下記エラーとなります。

FAILED! => {"msg": "The lookup aws_secret requires boto3 and botocore."}

近い内に修正されると思いますが、region指定部分で不具合があります。

FAILED! => {"msg": "An unhandled exception occurred while running the lookup plugin 'aws_secret'. Error was a <type 'exceptions.KeyError'>, original message: 'Requested entry (plugin_type: lookup plugin: aws_secret setting: region ) was not defined in configuration.'"}

PRされている修正を反映すると、取得できました。

  • ansible/plugins/lookup/aws_secret.py
@@ -14,6 +14,7 @@
   - botocore>=1.10.0
 extends_documentation_fragment:
   - aws_credentials
+  - aws_region
 short_description: Look up secrets stored in AWS Secrets Manager.
 description:
   - Look up secrets stored in AWS Secrets Manager provided the caller

GetSecretValue

+------------------+----------------------------------+
|    Name          |        SecretString              |
+------------------+----------------------------------+
|  dev/test_secret |  {"dev/test_secret":"testtest"}  |
+------------------+----------------------------------+

tasks例

存在しないシークレットの指定はエラーとなります。

FAILED! => {"msg": "An unhandled exception occurred while running the lookup plugin 'aws_secret'. Error was a <class 'ansible.errors.AnsibleError'>, original message: Failed to retrieve secret: ResourceNotFoundException(u'An error occurred (ResourceNotFoundException) when calling the GetSecretValue operation: Secrets Manager can\\u2019t find the specified secret.',)"}
  pre_tasks:
    - name: 'set secrets'
      set_fact:
        an1:
          secret1: "{{ lookup('aws_secret', 'dev/test_secret') }}"
  tasks:
    - name: 'output secrets'
      debug: var="{{ item }}"
      with_items:
        - "an1.secret1"
        - "an1.not_exist"

実行結果

TASK [set secrets] **********************************************************************
ok: [test-instance]

TASK [output secrets] *******************************************************************
ok: [test-instance] => (item=an1.secret1) => {
    "an1.secret1": {
        "dev/test_secret": "testtest"
    },
    "ansible_loop_var": "item",
    "item": "an1.secret1"
}

aws_ssm

制限事項がいくつかありますが、SSM 経由でシークレットマネージャの参照が可能ですので、同様に取得できます。

tasks例

予約パス /aws/reference/secretsmanager/ を含めて指定します。

  pre_tasks:
    - name: 'set secrets using ssm parameter store'
      set_fact:
        an1:
          secret: "{{ lookup('aws_ssm', '/aws/reference/secretsmanager/dev/test_secret') }}"
          not_exist: "{{ lookup('aws_ssm', '/aws/reference/secretsmanager/dummy') }}"
  tasks:
    - name: 'output secrets'
      debug: var="{{ item }}"
      with_items:
        - "an1.secret"
        - "an1.not_exist"

実行結果

TASK [set secrets using ssm parameter store] ********************************************
ok: [test-instance]

TASK [output secrets] *******************************************************************
ok: [test-instance] => (item=an1.secret) => {
    "an1.secret": {
        "dev/test_secret": "testtest"
    },
    "ansible_loop_var": "item",
    "item": "an1.secret"
}
ok: [test-instance] => (item=an1.not_exist) => {
    "an1.not_exist": "",
    "ansible_loop_var": "item",
    "item": "an1.not_exist"
}

__NSPlaceholderDate initialize エラー

Mac OS Mojave (10.14.x) で playbook を実行した際に以下のようなエラーが発生しました。

+[__NSPlaceholderDate initialize] may have been in progress in another thread when fork() was called.
+[__NSPlaceholderDate initialize] may have been in progress in another thread when fork() was called. We cannot safely call it or ignore it in the fork() child process. Crashing instead. Set a breakpoint on objc_initializeAfterForkError to debug.

以下の環境変数を設定することで回避可能です。

export OBJC_DISABLE_INITIALIZE_FORK_SAFETY=YES

High Sierra (10.13.x) からの仕様変更により発生するようです。

Redash REDASH_GOOGLE_APPS_DOMAIN はもう無い

(最新の)公式読みましょう。

To enable automatic user creation who belong to a specific domain name, you can add this domain (or more) in the setting page:

Redash では Google OAuth 認証が利用できますが、 特定のドメインのみ許可する設定は管理画面上で行います。

[Settings] -> [Settings] -> "Allowed Google Apps Domains" f:id:htnosm:20190502031819p:plain


導入に当たり、参考にした情報が古かったようで、 REDASH_GOOGLE_APPS_DOMAIN を使用(紹介)しているパターンが結構多かったです。 反映されないと小一時間悩みました。
既に廃止されています。

Windows版Squid導入あれやこれや

Windows Server 2016 へ Squid を導入します。 (※ プロキシ設定は触れません。)


Squid について

f:id:htnosm:20190119174746p:plain

コンパイルすることでSOCKSの対応もできそうな感じです。(未確認)

4.10 Does Squid support Socks?
We would like to use Squid, but we need it to use socks to connect to the world outside our firewall.

No changes are necessary to use Squid with socks5. Simply add the usual -Dbind=SOCKSbind etc., to the compile line and -lsocks to the link line.

インストールなど

インストール

ダウンロードした squid.msi でインストール。迷う所はありません。各種設定ファイルは C:\Squid\etc\squid\ に置かれます。

インストールが完了すると、デスクトップ上にアイコンが作成されます。

f:id:htnosm:20190119174847p:plain

  • Squid Server Tray
    • サービスの起動停止、設定ファイルへのリンクを選択できる簡易ツール

f:id:htnosm:20190119174908p:plain

サービスではなく、コマンドでの実行も可能です。

C:\Squid\bin>squid.exe -h
Usage: squid [-cdhvzCFNRVYX] [-n name] [-s | -l facility] [-f config-file] [-[au] port] [-k signal]
       -a port   Specify HTTP port number (default: 3128).
       -d level  Write debugging to stderr also.
       -f file   Use given config-file instead of
                 /etc/squid/squid.conf
       -h        Print help message.
       -k reconfigure|rotate|shutdown|restart|interrupt|kill|debug|check|parse
                 Parse configuration file, then send signal to
                 running copy (except -k parse) and exit.
       -n name   Specify service name to use for service operations
                 default is: squid.
       -s | -l facility
                 Enable logging to syslog.
       -u port   Specify ICP port number (default: 3130), disable with 0.
       -v        Print version.
       -z        Create missing swap directories and then exit.
       -C        Do not catch fatal signals.
       -D        OBSOLETE. Scheduled for removal.
       -F        Don't serve any requests until store is rebuilt.
       -N        No daemon mode.
       -R        Do not set REUSEADDR on port.
       -S        Double-check swap during rebuild.
       -X        Force full debugging.
       -Y        Only return UDP_HIT or UDP_MISS_NOFETCH during fast reload.

サービスは Squid for Windows という名前で作成されます。自動起動も有効化された状態です。

f:id:htnosm:20190119173903p:plain

ファイアウォール設定

squid 自体での接続元制限設定が行なえますが、それとは別にファイアウォール設定の必要があります。 Squid Cache Server ルールが作成されているので、適宜設定します。

f:id:htnosm:20190119173859p:plain

ログローテーション

ログファイルが C:\Squid\var\log\squid に作成されます。 ログローテーションはコマンド実行で行います。

C:\squid\bin> squid -k rotate

デフォルト10世代(ファイル)です。保存数を変更したい場合は設定ファイルに追記します。

logfile_rotate 10

タスクスケジューラ

Squid 固有というわけではないですが、ログローテーションの定期実行のため、スケジュール実行設定を行います。

C:\>schtasks /create /tn logrotate_squid /tr "C:\Squid\bin\squid.exe -k rotate" /sc weekly /ST 00:00 /rl highest /F /NP
SUCCESS: The scheduled task "logrotate_squid" has successfully been created.

f:id:htnosm:20190119174115p:plain

タスクスケジューラの履歴(ログ)

最近のWindowsはタスクスケジューラの履歴取得がデフォルトで無効のようでした。必要に応じて有効化します。

C:\>wevtutil set-log Microsoft-Windows-TaskScheduler/Operational /enabled:true

履歴の実体はイベントビューアーなので、詳細設定(ログ保持量等)はそちらで行います。

  • [Applications and Services Logs] -> [Microsoft] -> [Windows] -> [TaskScheduler] -> [Operational]

f:id:htnosm:20190119175251p:plain

Macで HTTP Proxy 経由のSSH

macOS からWindows を経由して SSH する機会があったため、調査した内容を残しておきます。
Web上で色々情報が見つかったのですが、現在では古い情報も混ざっているため自分用に整理した内容です。

f:id:htnosm:20190115014841j:plain


要件

macOS -> win_proxy(Windows) -> web(Linux)

上記のように直接接続が許可されていない、win_proxy(WindowsProxyサーバ)の背後のweb(Linuxサーバ)に対し、 macOSからSSH接続を行います。

HTTP CONNECT メソッドで接続を確立しトンネルすることで SSH での接続が可能になります。
環境は以下の通りです。

結果

Nmap付属のncatを使用すると最も環境に依存せずに実現可能と思います。

--proxy-type オプションで "http" を指定します。

Specify proxy type ("http" or "socks4" or "socks5")

$ ssh -o ProxyCommand='ncat --proxy-type http --proxy win_proxy:3128 %h %p' -i ~/.ssh/id_rsa ubuntu@web

# ssh config
Host    web
        Hostname        web
        User            ubuntu
        IdentityFile    ~/.ssh/id_rsa
        ProxyCommand ncat --proxy-type http --proxy win_proxy:3128 %h %p
        ServerAliveInterval 10

Linuxでのncコマンド

-X オプションで "connect" を指定します。

Supported protocols are “4” (SOCKS v.4), “5” (SOCKS v.5) and “connect” (HTTPS proxy).
If the protocol is not specified, SOCKS version 5 is used.

ssh ProxyCommand='nc -X connect -x win_proxy:3128 %h %p' -i ~/.ssh/id_rsa ubuntu@web

# ssh config
Host    web
        Hostname        web
        User            ubuntu
        IdentityFile    ~/.ssh/id_rsa
        ProxyCommand nc -X connect -x win_proxy:3128 %h %p
        ServerAliveInterval 10

Macでのncコマンド

macOS 標準搭載のncコマンドでは接続エラーを解消できずでした。

nc: Proxy error: "HTTP/1.1 200 Connection established" 
ssh_exchange_identification: Connection closed by remote host 

間にLinux等を挟む事で無理やり繋ぐ事は可能です。

ssh ProxyCommand='ssh bastion_linux nc --proxy-type http --proxy win_proxy:3128 %h %p' -i ~/.ssh/id_rsa ubuntu@web

# ssh_config
Host    bastion_linux
        Hostname    bastion_linux
        User        hoge

Host    web
        Hostname        web
        User            ubuntu
        IdentityFile    ~/.ssh/id_rsa
        ProxyCommand ssh bastion_linux nc --proxy-type http --proxy win_proxy:3128 %h %p
        ServerAliveInterval 10

調査

以下メモレベルですが、上記Nmap付属のncat使用に至った経緯です。
無駄に長いので折り畳みます。

続きを読む

Datadog win32_event_log (v6 日本語環境) 訂正

以前 Datadog Agent Version 6 で日本語環境でのイベントログ取得を確認したのですが、 検証に誤りがありました。

htnosm.hatenablog.com

再度確認した所、Agent Version 5 同様、 マルチバイトでは動作しませんでした。

Event Viewer Integration

WindowsイベントログをDatadogへ連携するインテグレーションが用意されていますが、 現時点では日本語環境ではエラーレベルでの絞り込みが行なえません。

カスタムチェック

version 6でも 5 同様のカスタムチェックを作成することで動作が確認できました。

win32_event_log.py から win32_event_log_ja.py を作成します。

  • win32_event_log.py
C:\Program Files\Datadog\Datadog Agent\embedded\Lib\site-packages\datadog_checks\win32_event_log\win32_event_log.py
  • win32_event_log_ja(差分) v6対応版
--- win32_event_log.py
+++ win32_event_log_ja.py
@@ -1,3 +1,12 @@
+#!/usr/bin/python
+# -*- coding: cp932 -*-
+'''
+日本語環境用イベントログ監視(v6)
+'''
+import sys
+reload(sys)
+sys.setdefaultencoding('cp932')
+
 # (C) Datadog, Inc. 2010-2017
 # All rights reserved
 # Licensed under Simplified BSD License (see LICENSE)
@@ -96,6 +105,18 @@
         if ltypes:
             query['Type'] = []
             for ltype in ltypes:
+                if ltype == 'Critical':
+                    ltype = '重大'
+                elif ltype == 'Error':
+                    ltype = 'エラー'
+                elif ltype == 'Warning':
+                    ltype = '警告'
+                elif ltype == 'Information':
+                    ltype = '情報'
+                elif ltype == 'Audit Success':
+                    ltype = '成功の監査'
+                elif ltype == 'Audit Failure':
+                    ltype = '失敗の監査'
                 query['Type'].append(('=', ltype))
         if source_names:
             query['SourceName'] = []
@@ -233,9 +255,11 @@
     def _alert_type(self):
         event_type = self.event['Type']
         # Convert to a Datadog alert type
-        if event_type == 'Warning':
+        if event_type == '警告':
             return 'warning'
-        elif event_type == 'Error':
+        elif event_type == '重大':
+            return 'error'
+        elif event_type == 'エラー':
             return 'error'
         return 'info'

win32_event_log_ja.py を checks.d、win32_event_log_ja.yaml(中身はwin32_event_log.yamlと同じ) を conf.d に格納して使用します。

C:\PROGRAMDATA\DATADOG
├─checks.d
│      win32_event_log_ja.py
├─conf.d
│  ├─win32_event_log_ja.d
│  │      conf.yaml

実行結果例

f:id:htnosm:20190111044426p:plain f:id:htnosm:20190111043855p:plain

システムアカウントの言語設定

尚、ログインユーザの言語設定が日本語でも、 システムアカウントの言語設定を英語としておけば、 そのまま win32_event_log を利用できます。

  • [コントロールパネル] -> [地域] -> [管理] -> [設定のコピー]

f:id:htnosm:20190111044155p:plain

ようこそ画面の欄がシステムアカウント設定も含むようです。

AWS API Call 数の取得

AWSの監視をCloudWatch以外(SaaS等)で行っている場合に、AWS API のコール数が気になります。
CloudTrail で証跡を保存、解析すれば詳細に分析できると思いますが、諸事情によりその手法が使えなかったので調べてみました。


AWSサービス

関連するAWSサービスの概要です。

CloudTrail Event

APIの実行履歴は CloudTrail Event で表示・取得できます。

CloudTrail は、作成時に AWS アカウントで有効になります。AWS アカウントでアクティビティが発生した場合、そのアクティビティは CloudTrail イベントに記録されます。

f:id:htnosm:20180917013940p:plain

Trail(証跡)が有効である必要はありません。ここでのTrail(証跡)は S3 等への転送を指します。

Trail(証跡)

CloudTrail Event を S3バケットや CloudWatch Logs へ転送する設定が行なえます。

Amazon Macie

機械学習によるユーザ動向の分析が行えるサービスです。

データソースとして AWS CloudTrail イベントログを利用できます。上記 Trail(証跡) を使用します。 また、現時点ではバージニアオレゴンリージョンのみの提供です。

f:id:htnosm:20180917013936p:plain

主要なSaaSAPI実行間隔

AWSの統合機能がある主要な SaaSAPI 実行間隔の情報です。

Datadog

We use the CloudWatch monitoring APIs to monitor your AWS resources. Our main use of these APIs is to gather raw metrics data through the GetMetricStatistics endpoint.

By default, we collect AWS metrics every 10 minutes.

デフォルトでは10分間隔で収集します。サポートへの依頼で間隔を変更することができます。

現時点では API コール数を参照する方法は用意されておらず、 AWS Biling インテグレーションを利用し、請求額を参照する事で把握する方法が紹介されています。

Mackerel

5分ごとに取得対象となるメトリックの数だけAWSAPIをコールして値を取得します。

New Relic

By default, the polling interval frequency is set to the maximum. You can change the polling frequency in the configuration settings.

サービス毎に異なり、デフォルトでは 1分 or 5分毎となるようです。[Configure]から設定変更も可能です。

AWS Account Status Dashboard からAPIコール数を参照できるようです。

可視化してみる

New Relic の AWS Account Status Dashboard と同等の物を Datadog で作成してみます。

定期的に CloudTrail Event を収集し、サマリを Datadog のカスタムメトリクスとして登録します。
今回は Datadog AWSインテグレーション用IAMロールを対象とし、Datadog へ送信していますが、仕組み的に応用は効きそうです。

f:id:htnosm:20180917013932p:plain

host を aws_account_no として登録しています。

f:id:htnosm:20180917020345p:plain

尚、Datadog で Custom Metrics を扱うには有償プランである必要があるようです。

留意点

LookupEvents を使用して CloudTrail Event を取得します。

The rate of lookup requests is limited to one per second per account. If this limit is exceeded, a throttling error occurs.

Lookup には1秒に1回の実行制限があります。

Events that occurred during the selected time range will not be available for lookup if CloudTrail logging was not enabled when the events occurred.

logging が有効であることが条件との記載がありますが、確認した限りではTrail(証跡)を有効化していないリージョンでも取得が行えていました。

CloudTrail typically delivers log files within 15 minutes of account activity.

Event が即時反映されないように見えたので、ドキュメントにあるよう、15分前の値を取得しています。

CloudWatch supports logging the following actions as events in CloudTrail log files:

Trail に出力されるAPIのみが対象になります。 叩かれているであろう GetMetricStatistics 等は残念ながら対象外です。

没案

CloudWatch のカスタムメトリクスとして登録する方法も考えましたが、 リージョン跨いで参照したかったのと、APIコール数参照のためにAPIコール数を増やすのもいかがなものかと思い、止めました。

f:id:htnosm:20180917013928p:plain

Datadog Logs Windows上の日本語ログ(SJIS)登録

Windows 上の Datadog Agent v6 でのログを tail で収集する場合、対象のログファイルは UTF8 である必要があるとのことです。

Note: If you are using the Windows 6 Agent and trailing files for logs - make sure that those files have a UTF8 encoding.

SJISのログを送信すると文字化けしてしまうので、UTF8へ変換しつつのログ送信を検証します。
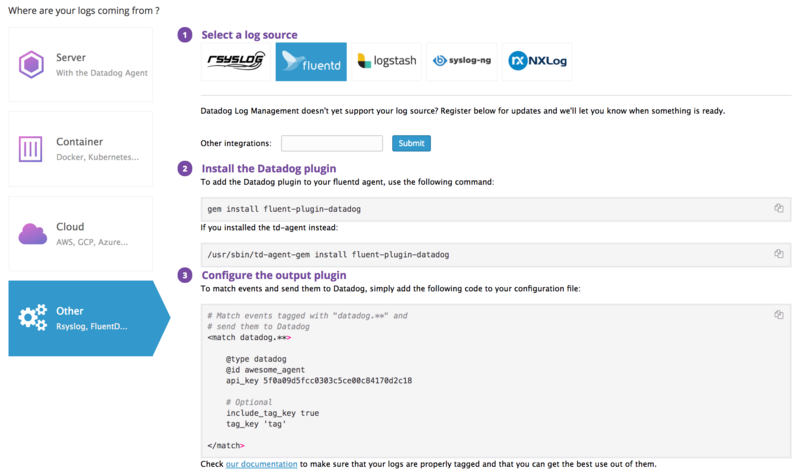
Datadogのマニュアルに未サポートのログファイルに対しては、ログ転送ソフトを介して送信するよう案内があります。 td-agent 3 が Windows をサポートしたので、今回は td-agent(fluentd) を使用します。

f:id:htnosm:20180811161224p:plain


環境

  • Windows Server 2012 R2 Standard
    • Datadog Agent Version 6.3.3
    • td-agent Version v3.1.1 (Fluentd v1.0.2)

対象ログファイル

以下の様な Shift_JIS 日本語を含むログファイルを対象とします。

f:id:htnosm:20180811162717p:plain

設定

Datadog Agent

ログ収集機能を有効化します。

  • [Datadog Agent Manager] -> [Settings]
    • 実体は C:\ProgramData\Datadog\datadog.yaml
log_enabled: true

カスタムログ用ファイル格納

任意の名称で設定ファイルを格納します。

mkdir C:\ProgramData\Datadog\conf.d\customlog.d
echo. > C:\ProgramData\Datadog\conf.d\customlog.d\conf.yaml

ディレクトリとファイルを作成することで、 GUI にも表示されるようになります。

  • [Datadog Agent Manager] -> [Checks] -> [Manage Checks]

Datadog Agent (v6)

datadog-agent(v6) 標準機能でのログ収集設定です。

  • customlog.d\conf.yaml
logs:

  - type: file
    path: C:\log\test.log
    service: app
    source: customlog

結果例

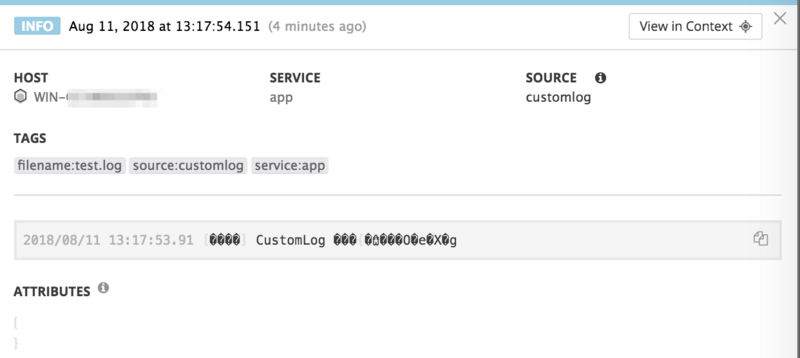
  • 文字化けする

f:id:htnosm:20180811161216p:plain

fluentd(td-agent)

fluentd で変換して取り込む設定です。 2パターン検証しましたが、いずれでも日本語文字列の文字化けは回避できました。

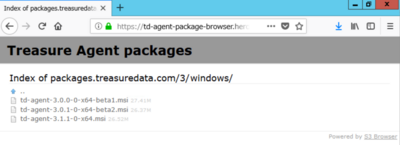
td-agent3 から Windows をサポートしています。

現時点での最新版 version v3.1.1 からは beta の文字が取れていました。

f:id:htnosm:20180811163048p:plain

文字コード変換には fluent-plugin-record-modifier の char_encoding を使用します。

設定

プラグインインストール

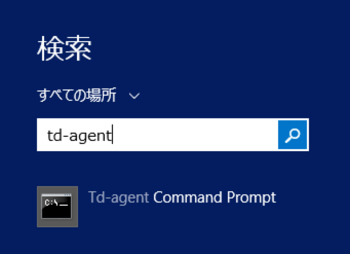
td-agent をインストールすると td-agent command prompt が利用できますので、そこからプラグインをインストールします。

f:id:htnosm:20180811162934p:plain

C:\opt\td-agent>fluent-gem install fluent-plugin-record-modifier
WARN: Unresolved specs during Gem::Specification.reset:
      win32-api (>= 1.4.5)
WARN: Clearing out unresolved specs.
Please report a bug if this causes problems.
Fetching: fluent-plugin-record-modifier-1.1.0.gem (100%)
Successfully installed fluent-plugin-record-modifier-1.1.0
Parsing documentation for fluent-plugin-record-modifier-1.1.0
Installing ri documentation for fluent-plugin-record-modifier-1.1.0
Done installing documentation for fluent-plugin-record-modifier after 0 seconds
1 gem installed

ログディレクト

pos ファイル格納用のディレクトリを作成しておきます。

C:\opt\td-agent>mkdir var\log

td-agent.conf

td-agent.conf は以下に格納されています。

C:\opt\td-agent\etc\td-agent\td-agent.conf

tail Input と record-modifier の設定を行います。

<source>
  @type tail
  path C:\log\test.log
  pos_file C:\opt\td-agent\var\log\test.log.pos
  tag fluentd.raw
  format none
</source>

<match fluentd.raw>
  @type record_modifier
  tag fluentd.encode
  char_encoding Windows-31J:utf-8
</match>

a) fluent-plugin-datadog

Datadog 公式のプラグインです。

インストール

C:\opt\td-agent>fluent-gem install fluent-plugin-datadog
WARN: Unresolved specs during Gem::Specification.reset:
      win32-api (>= 1.4.5)
WARN: Clearing out unresolved specs.
Please report a bug if this causes problems.
Fetching: fluent-plugin-datadog-0.10.4.gem (100%)
Successfully installed fluent-plugin-datadog-0.10.4
Parsing documentation for fluent-plugin-datadog-0.10.4
Installing ri documentation for fluent-plugin-datadog-0.10.4
Done installing documentation for fluent-plugin-datadog after 0 seconds
1 gem installed

設定

以下の様に設定します。 (便宜的に store を使用していますが、出力先が一つであれば不要です)

<match fluentd.encode>
  @type copy
  <store>
    @type datadog
    @id awesome_agent
    api_key <your api key>

    # Optional
    include_tag_key true
    tag_key 'tag'

    # Optional parameters
    dd_source customlog
    dd_tags 'host:WIN-XXXXXXXXXXX,service: app,filename:test.log'
    dd_sourcecategory multibytes
  </store>
</match>

結果例

  • 文字化け解消
  • Host、Serviceが付かない
    • dd_tags で Tag を付与しているが、一覧上は抜けた状態

f:id:htnosm:20180811161355p:plain f:id:htnosm:20180811161351p:plain

b) file Output Plugin

fluentd 標準で何とかする案です。変換後のファイルを Datadog Agent に読ませます。

設定

以下の様に設定します。

<match fluentd.encode>
  @type copy
  <store>
    @type file
    path C:\log\test.utc8.log
    append true
  </store>
</match>
  • customlog.d\conf.yaml
logs:

  - type: file
    path: C:\log\test.utc8.log\*.log
    service: app
    source: customlog

結果例

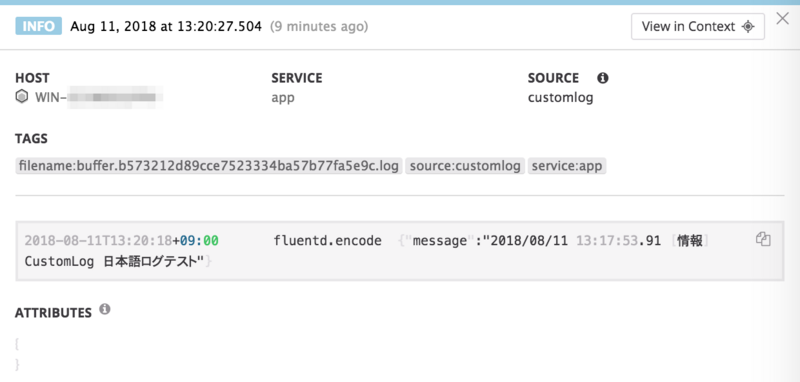
  • 文字化け解消
  • Datadog Agent 側の設定に沿って Host,Servce,Source が付与
  • ログ部分は JSON 形式 {"message": ""}

f:id:htnosm:20180811161347p:plain

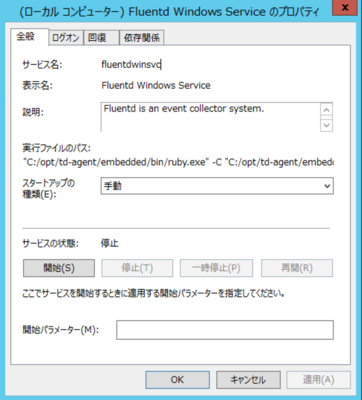
サービス化

公式の手順通りに fluentd を Windows サービス化します。

  • td-agent command prompt
fluentd --reg-winsvc i
fluentd --reg-winsvc-fluentdopt '-c C:/opt/td-agent/etc/td-agent/td-agent.conf -o C:/opt/td-agent/var/log/td-agent.log'

f:id:htnosm:20180811163137p:plain

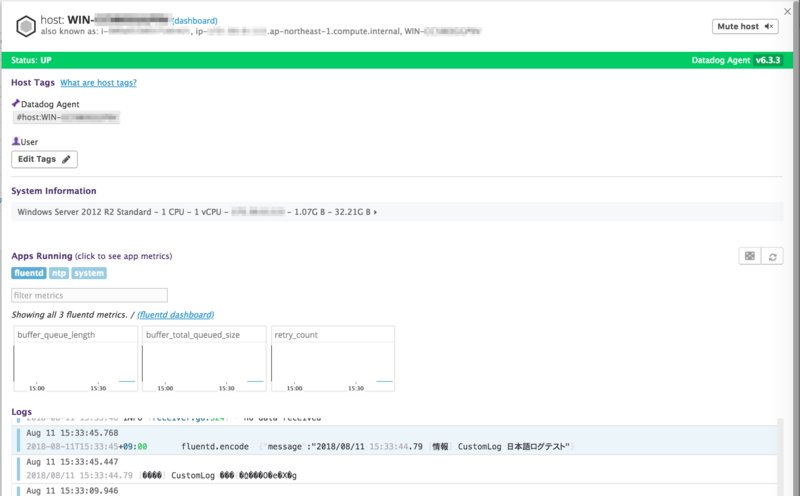
折角なので fluentd の監視 ( FluentD ) も入れます。

  • td-agent.conf
<source>
  type monitor_agent
  bind 0.0.0.0
  port 24220
</source>
  • Datadog (conf.d/fluentd.yaml)
init_config:

instances:
    -  monitor_agent_url: http://example.com:24220/api/plugins.json

f:id:htnosm:20180811161336p:plain


まとめ

日本語ログは扱いに困ります。

  • Windows での Datadog Agent(v6) Logs は UTF8 でないと文字化けする
  • UTF8 へ変換することで文字化けは解消可能(今回は fluentd を利用)
    • a案 fluent-plugin-datadog は Host、Service が付与されない
    • b案 file Output で別ファイルに書き出す事場合は出力形式が変わる

公式プラグインがイマイチだったのでb案を試してみた感じですが、性能面は全く見てないので実際使えるかは要検証です。