AWS IAM Identity Center (SSO) External Account での CLI 利用
AWS IAM Identity Center (旧 AWS SSO) で AWS CLI を利用する方法です。
Organizations 配下
Organizations 配下 AWS アカウントであれば、ポータル上の “Command line or programmatic access” を利用して AWS CLI で使用可能な認証情報を取得できます。
AWS CLI から sso サブコマンドで認証情報の取得も行なえます。
Organizations 外 (事前設定)
本題の前に準備です。
以下のように構成します。

External Account 設定 (管理アカウント側)
非Organizations AWS アカウントを IAM Identity Center へ割り当てます。
- IAM Identity Center → Applications →
External AWS Account
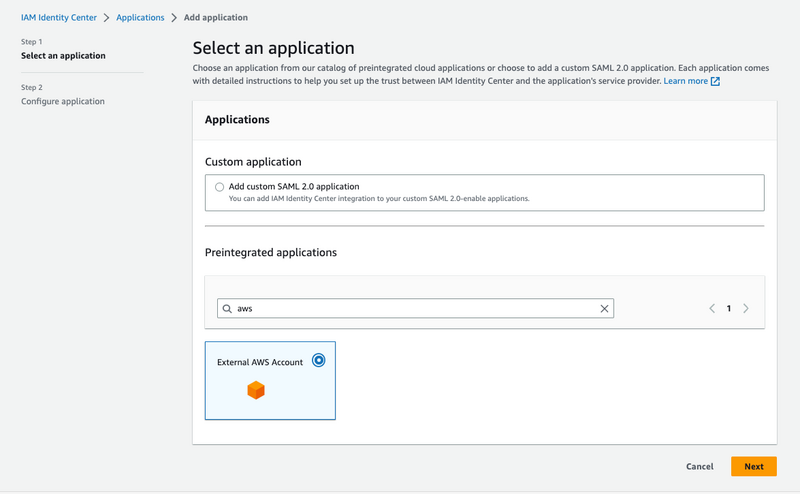
- Configure application
- デフォルト設定で動作します。
- Display name, Description, Session duration を任意の値に変更
- Assigned users
- 利用するユーザを割り当て
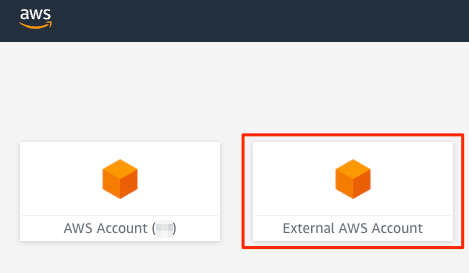
- 割り当てたユーザでポータルを開くと追加した Application が表示されます
- 利用するユーザを割り当て
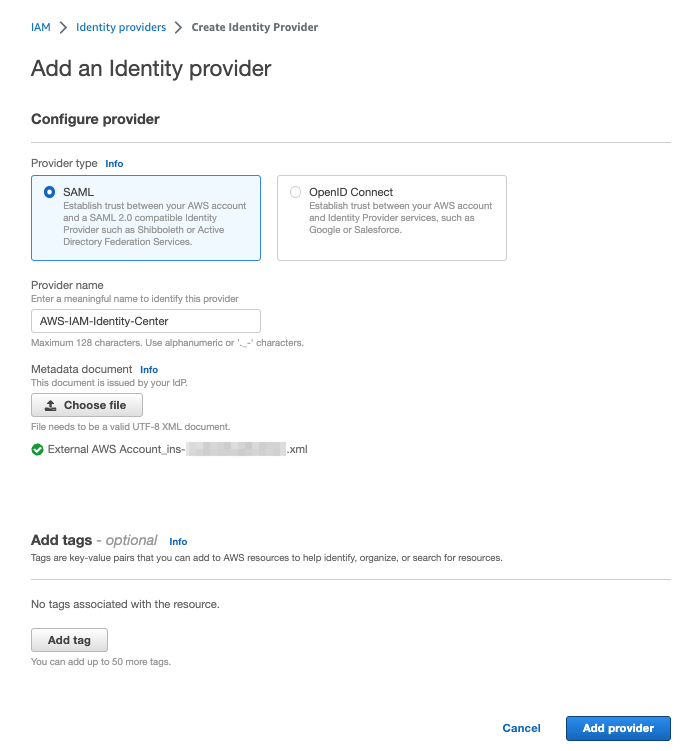
External Account 設定(非 Organizations AWS アカウント側)
- IAM → Identity providers → Add provider
- IAM → Role → Create role
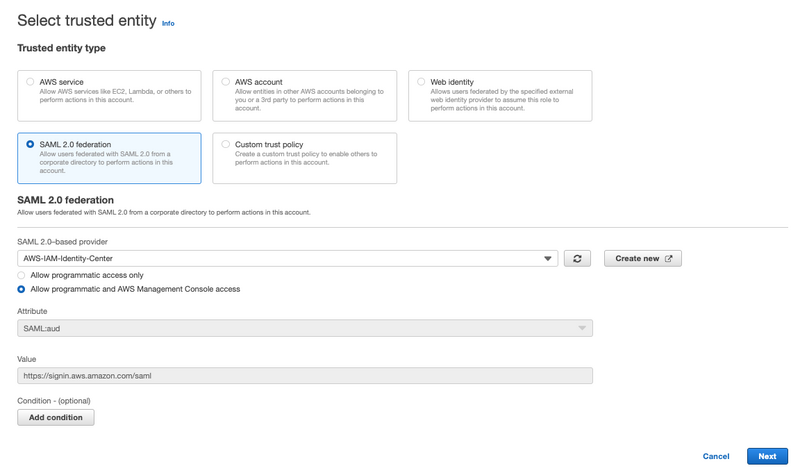
- Add permissions
- 必要に応じて権限を割り当て
- Name, review, and create
- Role name, Description を任意の値に変更
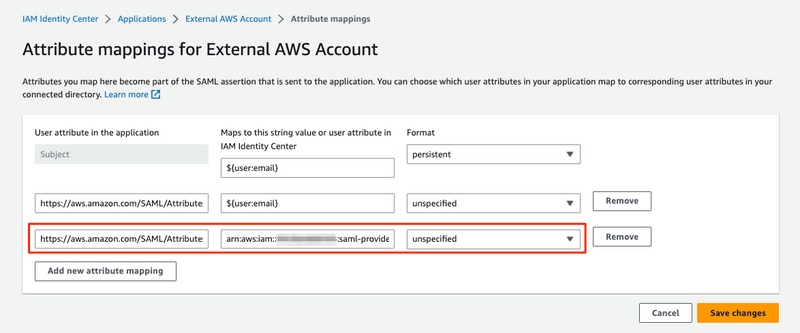
Attribute mappings 設定 (管理アカウント側)
- IAM Identity Center → Applications → 作成済みの External AWS Account
接続確認(マネジメントコンソール)
割り当てたユーザでポータルを開き、作成した Application をクリックします。
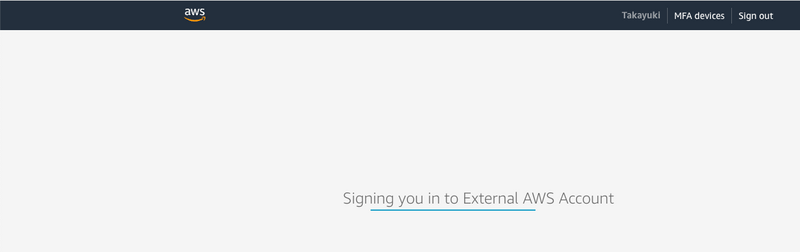
設定が正しければ 非Organizations AWS アカウント へ作成した IAM Role でマネジメントコンソールが利用できます。
Organizations 外
本題です。
Organizations に属していない非Organizations AWS アカウントに対しても同等に利用したいです。
External Account のボタン押下は、マネジメントコンソールへの遷移です。
Organizations 配下とは異なり、“Command line or programmatic access” 出力はありません。
AWS CLI の sso サブコマンドで設定・接続を試みるもエラーとなり利用できません。
An error occurred (ForbiddenException) when calling the GetRoleCredentials operation: No access
残念ながら現時点ではAWS標準機能で簡単に利用できる仕組みにはなっていません。
AssumeRoleWithSAML を利用する
AssumeRoleWithSAML を利用して接続が可能です。
SAMLResponse を取得して認証を行うことになります。
手順に沿って実施してみると以下のようになります。
- SAMLResponse 取得

- AssumeRoleWithSAML
$ aws sts assume-role-with-saml \
--role-arn arn:aws:iam::123456789012:role/AWS-IAM-Identity-Center \
--principal-arn arn:aws:iam::123456789012:saml-provider/AWS-IAM-Identity-Center \
--saml-assertion file://samlresponse.log | awk -F:  '
  BEGIN { RS = "[,{}]" ; print "[PROFILENAME]"}
  /:/{ gsub(/"/, "", $2) }
  /AccessKeyId/{ print "aws_access_key_id = " $2 }
  /SecretAccessKey/{ print "aws_secret_access_key = " $2 }
  /SessionToken/{ print "aws_session_token = " $2 }
'

[PROFILENAME]
aws_access_key_id =  XXXXXXXXXXXXXXXXXXXX
aws_secret_access_key =  xxxxxxxxxxxxxxxxxxxxxxxxxxxxxxxxxxxxxxxx
aws_session_token =  ...
返却される Credential を使用して接続を行います。
SAMLResponse の取得を自動化
本当の本題です。
理屈はわかったのでブラウザの開発ツールから SAMLResponse を取得するという部分も自動的に行いたいです。
実施したい事は How to Implement a General Solution for Federated API/CLI Access Using SAML 2.0 | AWS Security Blog に記載の内容です。
この記事を元に実装されている OSS saml2aws を利用します。
saml2aws の設定例
環境
- saml2aws: 2.36.9
- Google Workspace を IAM Identity Center 外部プロバイダとして使用
configure
saml2aws configure
- Please choose a provider:
Browser - URL: https://d-XXXXXXXXXX.awsapps.com/start/#/saml/default/External AWS Account/ins-xxxxxxxxxxxxxxxx
- ポータルのボタンを右クリック → リンクのアドレスをコピー から取得しています
saml2aws の README に記載がありますが、 Browser provider を利用する場合は playwright-go が必要になります。
login
# 初回 playwright-go を含める
# saml2aws login --download-browser-driver

saml2aws login
プロンプトで Username, Password を聞かれますが、特に入力せず Enter 押下で進めると、 Chromium が立ち上がるのでそこでも認証を行います。当方環境では Google Workspace のログインです。
認証プロセスが完了または失敗すると Chromium は自動終了します。 ユーザ割り当てが行われていない場合などで Chromium での認証が失敗した場合、 プロンプトは waiting … のままになります。
Using IdP Account default to access Browser https://d-XXXXXXXXXX.awsapps.com/start/#/saml/default/External AWS Account/ins-xxxxxxxxxxxxxxxx
To use saved password just hit enter.
? Username (hoge@example.com)
? Password

Authenticating as hoge@example.com ...
INFO[0006] opening browser                               URL="https://d-XXXXXXXXXX.awsapps.com/start/#/saml/default/External%20AWS%20Account/ins-xxxxxxxxxxxxxxxx" provider=browser
waiting ...
INFO[0035] clean up browser                              provider=browser
Selected role: arn:aws:iam::123456789012:role/AWS-IAM-Identity-Center
Requesting AWS credentials using SAML assertion.
Logged in as: arn:aws:sts::123456789012:assumed-role/AWS-IAM-Identity-Center/hoge@example.com

Your new access key pair has been stored in the AWS configuration.
Note that it will expire at 2023-06-24 00:00:00 +0900 JST
To use this credential, call the AWS CLI with the --profile option (e.g. aws --profile saml ec2 describe-instances).
~/.aws/credential に [saml] プロファイルが作成されています。( configure でオプション指定している場合は指定したプロファイル名)
ここに取得した Credential 情報が設定されています。
確認
上記で設定したプロファイルを使用して AWS CLI を実行します。
% aws sts get-caller-identity --profile saml
{
    "UserId": "XXXXXXXXXXXXXXXXXXXXX:hoge@example.com",
    "Account": "123456789012",
    "Arn": "arn:aws:sts::123456789012:assumed-role/AWS-IAM-Identity-Center/hoge@example.com"
}
~ % aws s3 ls --profile saml
...
まとめ
External AWS Account でも Access Key の発行を行わず、一時的な認証情報を取得して利用できるのでセキュアに運用できそうです。
SAMLResponse の取得は saml2aws で行えます。
saml2aws で指定する provider に GoogleApps がありますが、こちらは IdP を Google Workspace にする場合に使用します。